LESSON 73: TWISTED CHAIN POINT
20 de July de 2021Twisted Chain Stitch Tutorial
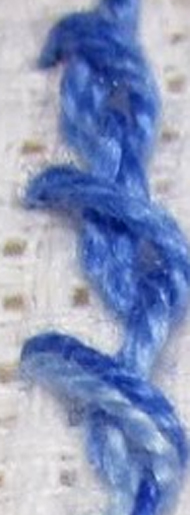
We present you the tutorial for the twisted chain stitch. A precious point.
It can also be embroidered in the same color of the fabric or different depending on the final effect we want to achieve.
It is usually used in decorative straight lines and trims and is worked from top to bottom.
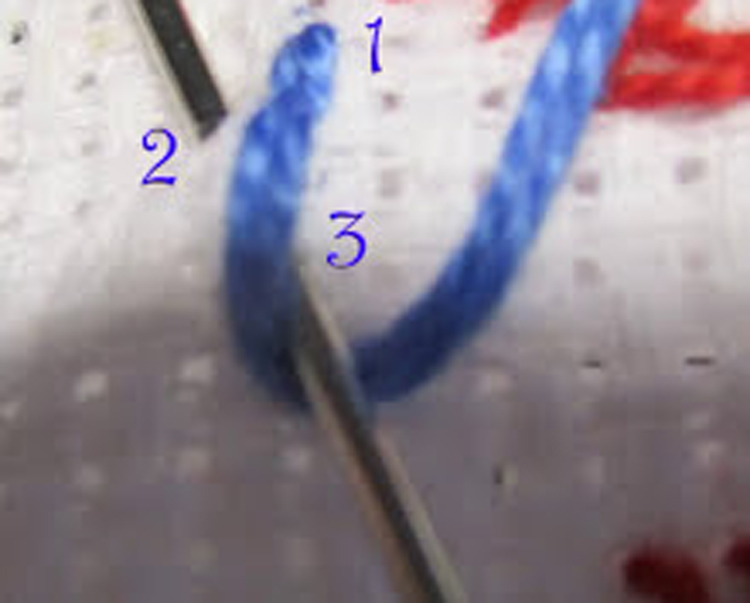
Fig. A: Take out the needle at 1 and put it in 2, a little below and to the left of 1, looping the thread as in the illustration. Pull the needle out again at 3.
Fig. B, insert the needle at 4, outside the previous loop, braid the thread as before and remove the needle at 5.
Repeat it as many times as you need. Finish off the last link with a small linear dot.
From here we invite you to try it and you will be surprised by the effect. It does not go unnoticed. I encourage you to try and you will love it.
Follow the tutorial step by step and you will see how while you are sewing you can think of other ways to make other stitches, even combined with all the ones that I am putting here. You can use it both in borders, as in curtains, sheets, towels etc. or as a simple ornament point in one of your paintings. It is best to follow the video step by step here:
Materials
- You need a blunt needle. In your trusted haberdashery they can advise you on this.
- Thimble, we know that it is not easy to get used to it, but the earlier you adapt, the better, you will avoid many punctures.
- Special pearl or mouliné thread. Or you can also use fine crochet yarn
- Frame, there are made of wood, plastic and silicone. Lately I spend the silicone ones because I like them better, but that goes to taste.
- Light, the more the better and to be able to be natural
If you liked this lesson in fancy knit combined in two colors or just one, you can try some more of the ones we publish here