LESSON 111: HELECTION POINT
16 de December de 2021Tutorial for fern stitch:
Este punto se usa como relleno sólido para hojas pequeñas y formas similares.
Tienes que marcar el tejido con el contorno de la forma y una línea central, que puede ser recta o curva.

Trabaja desde la punta hasta la base:
Fig. A: Saca la aguja en 1 y métela en 2, sácala de nuevo en 3 y métela en 4, superponiéndola al punto anterior. Saca la aguja en 5.

Fig. B: Inserta la aguja en 6 (superponla al punto anterior) y sácala en 7 para empezar el siguiente par de puntos.
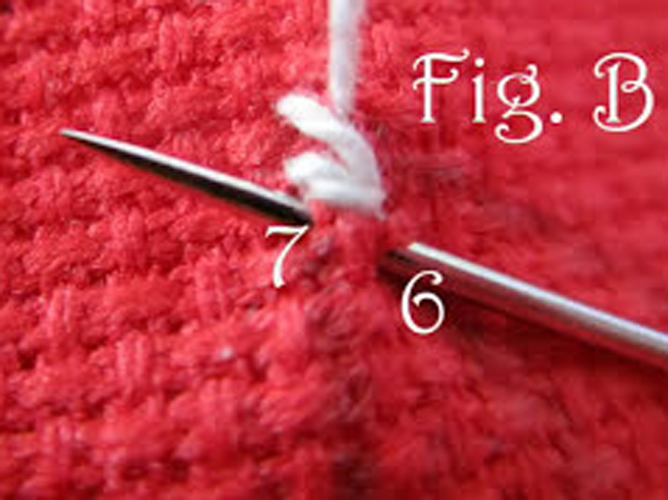
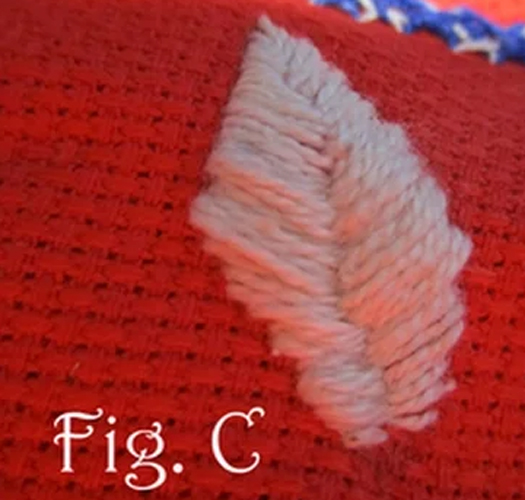
Fig. C: Continue making alternately left and right points, overlapping them along the center line. The last point can be extended to represent a stem.
Watch the full video, clicking on the following image:
Materials
- You need a sharp pointed needle. In your trusted haberdashery they can advise you on this.
- Thimble, we know that it is not easy to get used to it, but the earlier you adapt, the better, you will avoid many punctures.
- Special thread for sewing. Or you can also use fine crochet yarn if it is to decorate something
- Frame, there are made of wood, plastic and silicone. Lately I spend the silicone ones because I like them better, but that goes to taste.
- Light, the more the better and to be able to be natural
If you liked this lesson in fancy knitting, you can try some more of the ones we publish here