LESSON 119: STITCH OF REALCE
18 de January de 2022Tutorial for highlighting stitch:
Same stitch in two versions: Enhance and enhance with non-woven fabric:
This stitch is used on smooth and solid fillers for small areas, with a high, relief effect. The quilting may consist of a lower layer of stitches or a cut shape of a non-woven fabric, such as felt or handmade interweave. Use the same thread for all stitch layers.
REALCE:
Decide the direction in which the final layer of points will incline.
Fig. A: Shape the figure with split cord stitch.
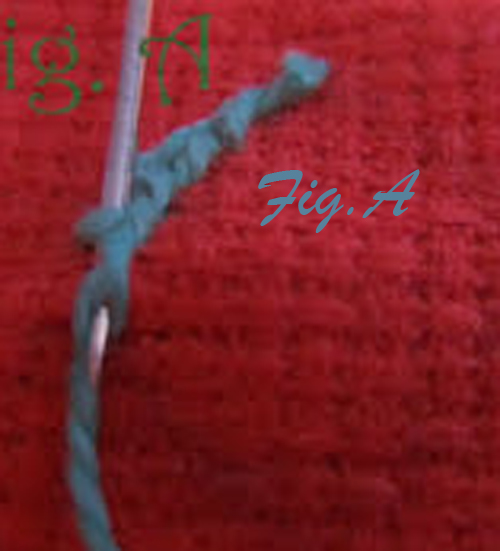
Fig. B: Cubre el área con punto de realce, inclinando los puntos en una dirección algo diferente de la que se requiere para la capa final, punteando justo fuera del contorno del punto de cordoncillo.
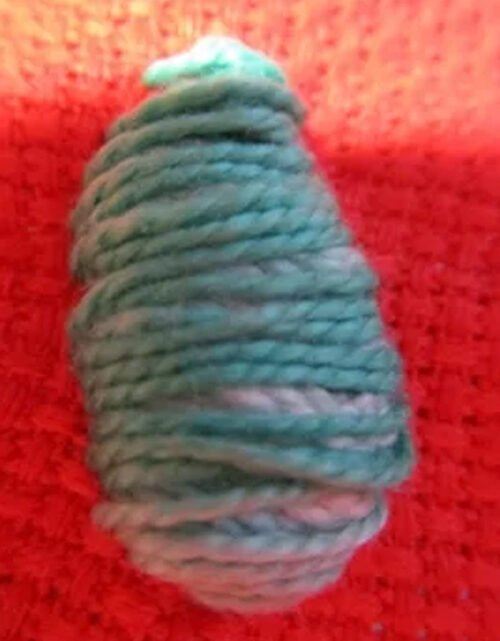
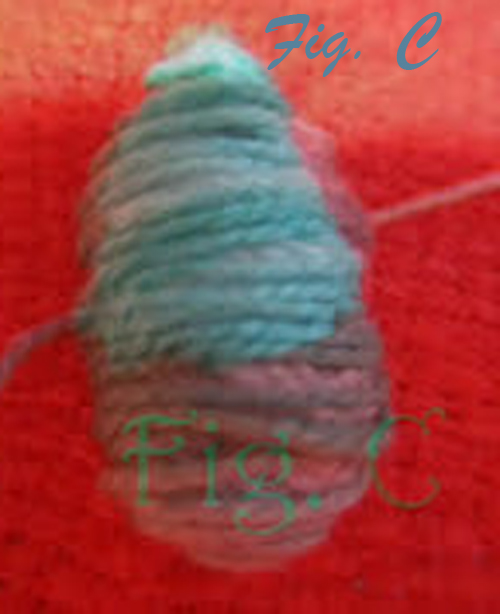
Fig. C: Work the final layer of highlight stitch by tilting it as needed.
REALCE WITH WITHOUT TABLE:
Cut out the shape in colored felt or artisan interweave. You can use this last car glued with iron and thus omit the point in fig. D.
Fig. D: Using thin thread, puncture the pattern with small straight dots across the untreated edges.
Fig. E: Cover the figure with a flat point.
Fig. F: Details can be added by using a small stitch line to hold the flat points.
Watch step by step the following video:
Materials
- You need a sharp pointed needle. In your trusted haberdashery they can advise you on this.
- Thimble, we know that it is not easy to get used to it, but the earlier you adapt, the better, you will avoid many punctures.
- Special thread for sewing. Or you can also use fine crochet yarn if it is to decorate something
- Frame, there are made of wood, plastic and silicone. Lately I spend the silicone ones because I like them better, but that goes to taste.
- Light, the more the better and to be able to be natural
If you liked this lesson in fancy knitting, you can try some more of the ones we publish here