LESSON 146: FERN STITCH
24 de May de 2022Tutorial for fern stitch:
Here’s the Tutorial for fern stitch:
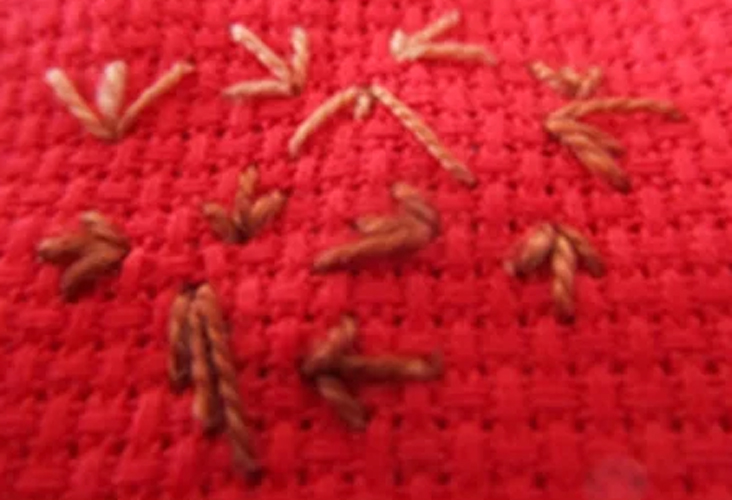
It is used as a scattered filler or in straight or curved lines for foliage effects.
Works in any direction:
How do you do that?
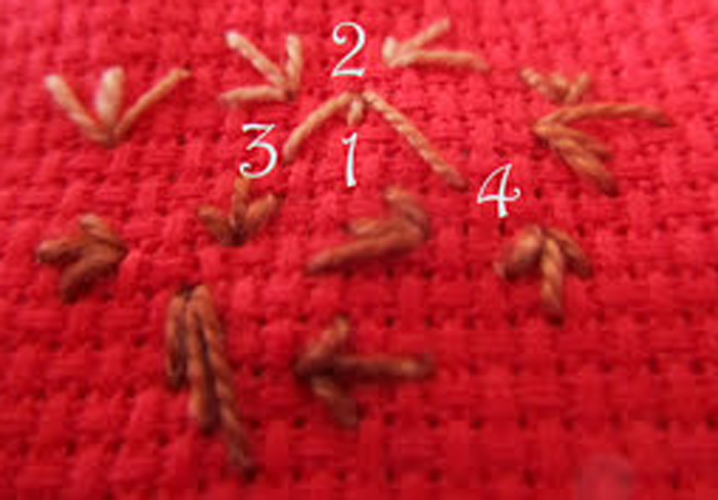
Draw the needle out on 1 and cast it in on 2 to make the center stitch in the desired direction. Draw the needle out on 3, cast it in on 2, draw it out on 4 and cast it back in on 2. Repeat as needed. The three stitches in each group can be the same length, at equal angles to each other, or you can vary them to your liking for a foliage effect.
Repeat the steps as many times as needed.
Here is the Tutorial for fern stitch:
Materials
- You need a sharp pointed needle. In your trusted haberdashery they can advise you on this.
- Thimble, we know that it is not easy to get used to it, but the earlier you adapt, the better, you will avoid many punctures.
- Special thread for sewing. Or you can also use fine crochet yarn if it is to decorate something
- Frame, there are made of wood, plastic and silicone. Lately I spend the silicone ones because I like them better, but that goes to taste.
- Light, the more the better and to be able to be natural
If you liked this lesson of fantasy point.You can try some more of the ones we publish here