LESSON 103: EXTENDED CROSS POINT
18 de November de 2021Tutorial for elongated cross stitch:
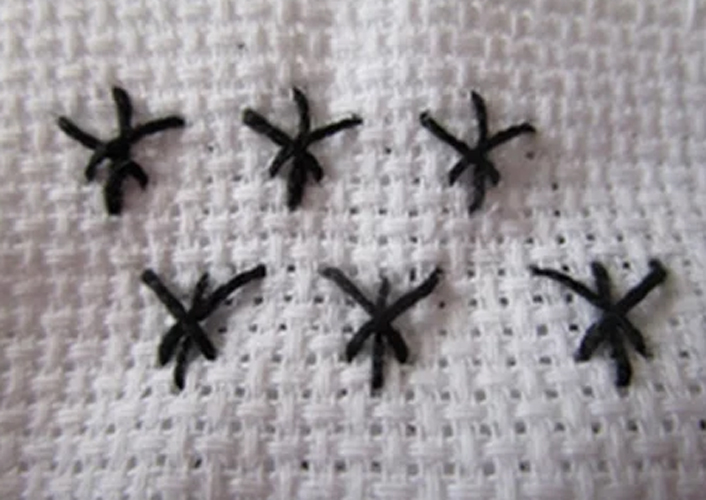
With this tutorial for elongated cross stitch, we show you again that what you knew as normal cross stitch has many more varieties, and this is one more. With this new point you will discover a fantasy point that you will love.
This stitch can be worked individually, in rows or arranged as a fill pattern; it is usually used in black work.
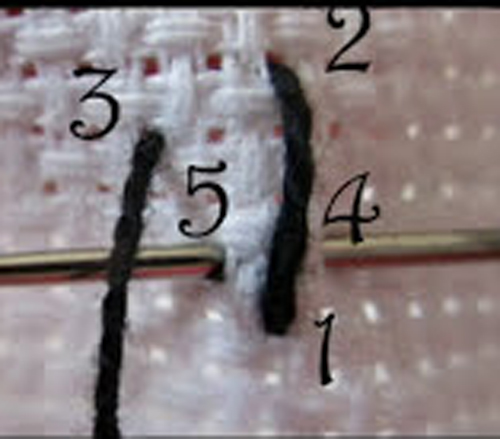
Work a long vertical stitch: remove the needle at 1 and put it in 2. Make an elongated cross stitch, wider at the top than at the bottom, located a little above the vertical stitch, as shown in the photo: remove the needle at 3 and insert it at 4. Distance 3-2 is greater than 4-1. Take the needle out at 5 and put it in at 6.
Repeat the steps as much as you need to.

Repeat as many times as you need.
Watch the full video, clicking on the following image:
Materials
- You need a sharp pointed needle. In your trusted haberdashery they can advise you on this.
- Thimble, we know that it is not easy to get used to it, but the earlier you adapt, the better, you will avoid many punctures.
- Special thread for sewing. Or you can also use fine crochet yarn if it is to decorate something
- Frame, there are made of wood, plastic and silicone. Lately I spend the silicone ones because I like them better, but that goes to taste.
- Light, the more the better and to be able to be natural
If you liked this tutorial for Tutorial for elongated cross stitch: If you liked this lesson you can try some more of the ones we publish here
