Lesson 140: DIAGONAL STRENGTHEN FILLING
6 de May de 2022Tutorial for a lay diagonal filling:
Hello, welcome to Tutorial for lying diagonal filling point; a type of stitch that will help you, for example, cover holes in your clothing while remaining decorative.
It is used in fairly open fillers for both regular and irregular shapes and of small and medium size. The tissue should be firmly extended.
Fill the area with filling points and attachment points.
How do you do that?
Fig. A: Add diagonal stitches: Remove the needle in 1, put it in 2, pull it out in 3 and put it in 4. Repeat steps towards the lower right margin. Complete the diagonal grid with long dots in the opposite direction, as shown in the picture.
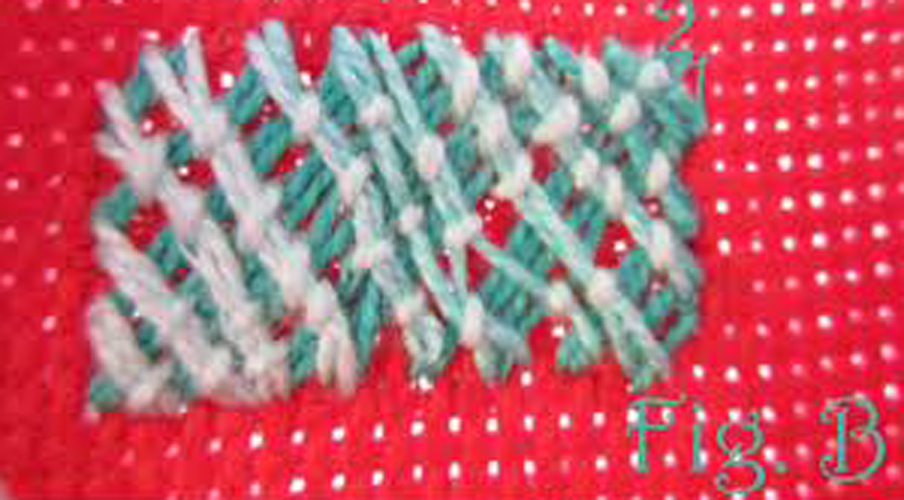
Fig. B: Asegura cada intersección de la rejiila diagonal, sacando siempre el hilo en 1, bajo la intersección y metiéndolo en 2, por encima de la intersección.
Here is the Tutorial for diagonal filling point lying:
Materials
- You need a sharp pointed needle. In your trusted haberdashery they can advise you on this.
- Thimble, we know that it is not easy to get used to it, but the earlier you adapt, the better, you will avoid many punctures.
- Special thread for sewing. Or you can also use fine crochet yarn if it is to decorate something
- Frame, there are made of wood, plastic and silicone. Lately I spend the silicone ones because I like them better, but that goes to taste.
- Light, the more the better and to be able to be natural
If you liked this lesson of fantasy point.You can try some more of the ones we publish here