LESSON 158: RAISED TRIANGLE POINT
16 de June de 2022Tutorial for Raised triangle stitch:
Here’s the Tutorial for raised triangle stitchanother proposal of fantasy stitch that we propose you in Bordarycantar.com.
What is it used for?
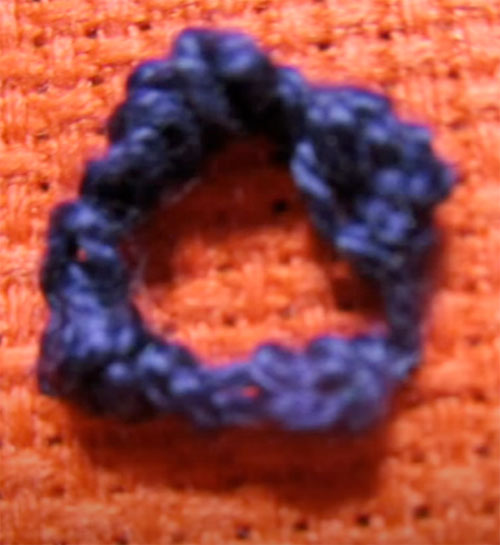
It is used in closed and independent more or less circular motifs, used to represent small flowers. If the starting points are worked in an equilateral triangle, as in the diagrams, the final effect will be circular.
How do you do that?
First work a backstitch triangle as a base:
Fig. A: Pull the needle out in 1, put it in 2, pull it out in 3, put it in 1. Pull it out in 2 and put it in 3.
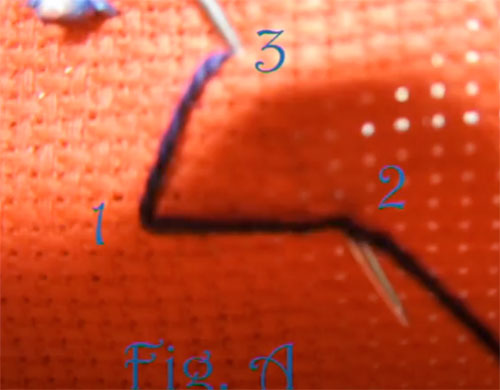
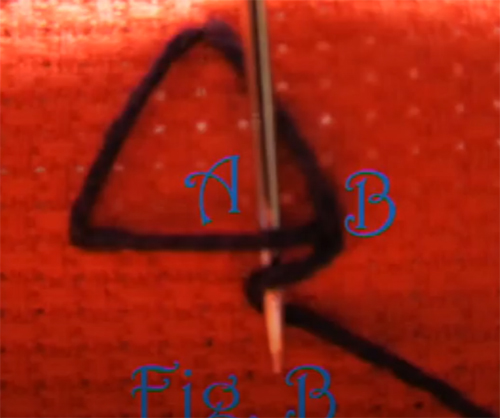
Fig. B: Pull the needle out just below 2. Switch to a needle just below 2. Pass the needle under the first bar from A to B without piercing the fabric, with a loop around the needle.
See how we are working on it:
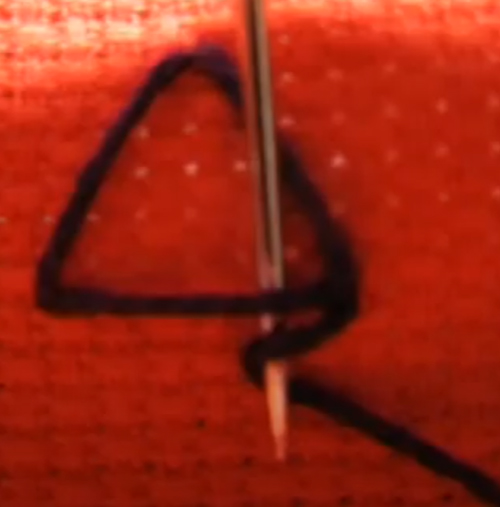
Pull carefully. Repeat the steps clockwise around the triangle, joining the stitches together to form a circle.
Here is the Tutorial for Raised triangle stitch:
Materiales para coser con el tutorial de Punto de Triángulo alzado:
- You need a sharp pointed needle. In your trusted haberdashery they can advise you on this.
- Thimble, we know that it is not easy to get used to it, but the earlier you adapt, the better, you will avoid many punctures.
- Special thread for sewing. Or you can also use fine crochet yarn if it is to decorate something
- Frame, there are made of wood, plastic and silicone. Lately I spend the silicone ones because I like them better, but that goes to taste.
- Light, the more the better and to be able to be natural
If you liked this lesson of fantasy point.You can try some more of the ones we publish here