LESSON 224: RICE STITCH. CROSS-CORNER STITCH. FANTASY STITCH. DIY CANVAS
14 de February de 2023Tutorial for Rice stitch. Crossed corner stitch.
Here’s the Tutorial for rice stitch or crossed corners. Another proposal of fantasy stitch in hemp stitch that we propose you at Bordarycantar.com.
What is it used for?
For small and large areas. Background texture; can be worked in two colors.
How do you do that?
Start at the top right:
Fig. ADraw the needle out at 1, cast it in at 2, draw it out at 3 and cast it in at 4, thus forming a cross stitch. Now knit a diagonal stitch through each arm of the cross: from 5 to 6, from 7 to 6, from 8 to 7 and from 5 to 8. Draw the needle out on 3 to start the next repeat to the left.
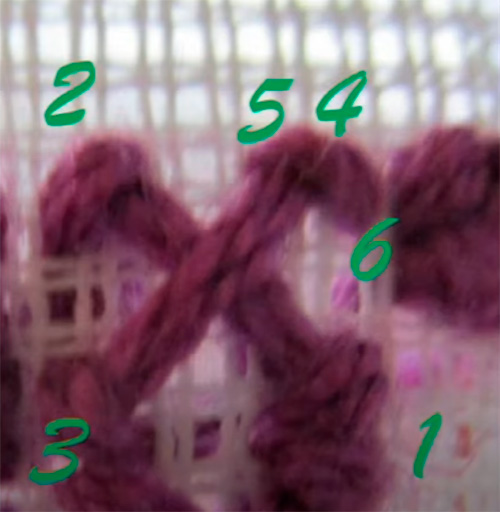
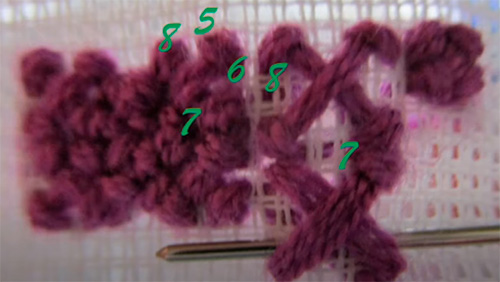
Fig. BCast on the next row from left to right. Pull out the needle at 9. Work each unit in the same order as before.
To work with two colors, stitch all large crosses in the first color and all small cross stitches with the second color.
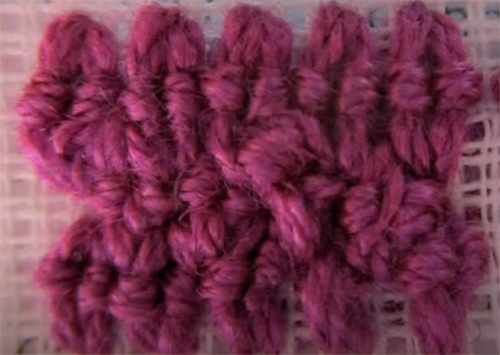
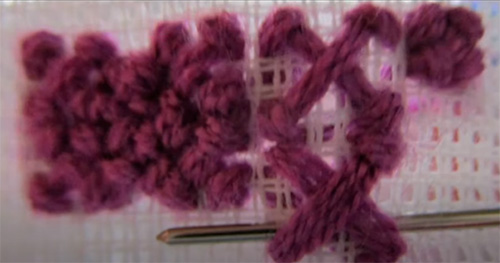
Here I show you a small sample of how it looks finished:
Here is the Tutorial para Punto de arroz:
Embroidery materials Rice stitch and crossed corners:
- You need a sharp pointed needle. In your trusted haberdashery they can advise you on this.
- Canvas fabric
- Thimble, we know that it is not easy to get used to it, but the earlier you adapt, the better, you will avoid many punctures.
- Special thread for sewing. Or you can also use fine crochet yarn if it is to decorate something
- Frame, there are made of wood, plastic and silicone. Lately I spend the silicone ones because I like them better, but that goes to taste.
- Light, the more the better and to be able to be natural
If you liked this lesson of fantasy point.You can try some more of the ones we publish here